Why is my shower leaking from the base?
A shower base most commonly leaks due to worn-out sealant around the edges, a cracked shower tray, or loose plumbing connections beneath the base. Sealant deteriorates over time from constant moisture and temperature changes, while trays can develop hairline cracks from years of weight and stress. If the leak is coming from concealed pipework rather than the surface, you’ll need a licensed plumber to diagnose it properly
How can I tell where a shower base leak is coming from?
Start with a visual inspection for cracked tiles, damaged grout, or failing seals. If nothing’s obvious, a water test can help: block the drain, fill the base a few centimetres deep, mark the water level, and check it again after an hour. If the level’s dropped, the leak is likely in the base itself rather than the plumbing behind it. For anything beyond that, a pressure test carried out by a licensed plumber will confirm whether the leak is in the pipework.
Can I fix a leaking shower base myself?
Minor issues like worn sealant or small cracks in the tray can often be handled with a resealing job or a repair kit. Loose plumbing fittings behind the shower may just need tightening. But if the leak is coming from inside the wall or under the base, or you’re not confident diagnosing the cause, it’s worth getting a licensed plumber to check it before more damage is done. We diagnose and repair grout, tap, and waterproofing leaks across the Hills District — you can read more here: Leaking Shower Repairs.
What happens if I leave a leaking shower base unfixed?
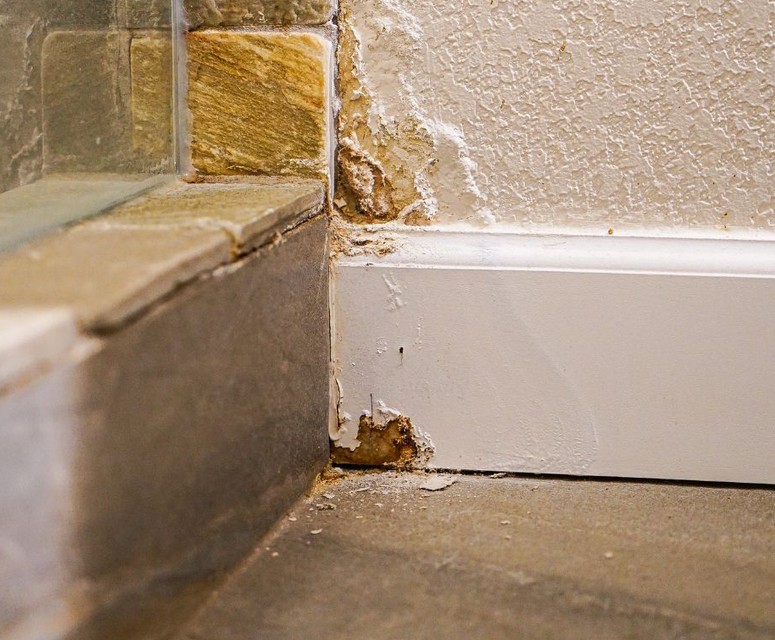
Left untreated, water tracking into wall cavities or the subfloor can cause structural damage, mould, and rot well before it’s visible on the surface. What starts as a simple resealing job can turn into a full waterproofing repair if it’s left too long.
Common Causes of Shower Base Leaks
When your shower leaks from the base, it’s typically due to a few specific issues. Understanding these can help you identify and tackle the problem effectively.
Worn Out Sealant
The sealant around your shower base, often made from silicone or other caulking materials, can deteriorate over time. Exposure to moisture and temperature fluctuations can cause sealant to shrink, crack, or peel away, allowing water to seep through the gaps.
Cracked Shower Tray Or Base
Your shower tray endures constant stress and weight. Over time, this can lead to hairline cracks or more significant damage. Even the tiniest crack can allow water to leak, so you must inspect your shower tray or shower tiles regularly for any signs of damage.
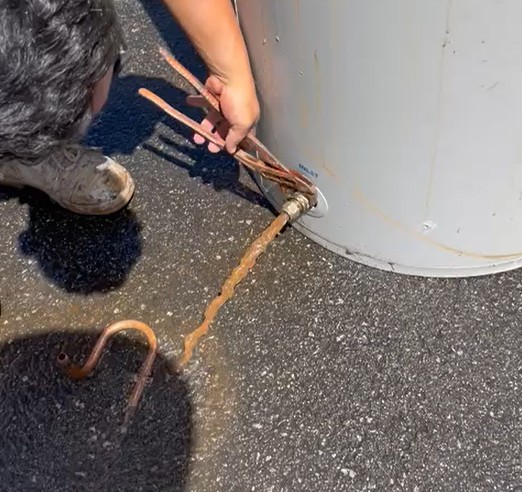
Loose Plumbing Connections
Plumbing fixtures connected to your shower can loosen, especially if they weren’t properly installed. Check for gaps where the pipes meet the base and ensure connections are tight. Any looseness can lead to water leakage beneath the shower base.
Repair Solutions
When addressing a leaking shower base, you must consider the specific issue at hand. The correct repair strategy will depend on the root cause, so implementing the appropriate solution is crucial.
Grout And Sealant Replacement
Over time, if the base is tiled, the grout may need to be replaced on the shower floor or resealed where the base and walls meet. If this is the source of your leak, you must completely remove the old grout or sealant.
This is called regrouting or resealing and we can help you with these repairs.
Shower Tray Repair
If the shower tray itself is cracked or has sustained damage, it may need repair or replacement. Smaller cracks can sometimes be fixed with a repair kit, while more significant damage might require installing a new tray.
- Assessment:
- Minor cracks: Can be repaired with a specific shower tray repair kit.
- Major damage: Consult with a professional for replacement.
Plumbing Tightening
Leaks can also stem from loose connections in the plumbing behind the shower. Inspect the pipes and fittings, and tighten any loose connections you encounter.
This often rectifies leaking pipes.
- Tightening Checklist:
- Make sure that the shower is not in use and that the area is dry.
- Tighten any visible fittings and replace worn out washers.
- Test the shower for leaks after the adjustments.
Helping To Fix A Leaking Shower Base
By following these steps and addressing the root causes of shower base leaks, you can effectively mitigate water damage and maintain the integrity of your bathroom. Regular inspections and timely repairs are crucial in preventing minor issues from becoming significant problems.
Remember, whether it’s resealing, repairing cracks, or tightening plumbing connections, taking prompt action will save you time and money in the long run.
For professional assistance, don’t hesitate to reach out to our team.
We are here to ensure your plumbing system remains leak-free and fully functional.
Frequently Asked Questions
What Causes A Shower To Leak From The Base?
Most shower base leaks come from one of three causes: failed silicone seals where the shower base meets the wall, cracked or worn waterproofing membrane underneath the tiles, or a leaking shower trap or drain connection. Older Hills District showers built before 2000 often have membrane failure as the underlying issue. Newer showers usually fail at the silicone seal first.
How Do I Know If My Shower Is Leaking Before Water Damage Shows?
Early signs: musty smell in the bathroom or adjacent room, swollen or warped skirting boards next to the shower wall, soft or hollow-sounding tiles on the bathroom floor, paint bubbling on the ceiling of the room below, or unexplained increases in your water bill. The longer you leave it, the more damage extends into wall framing, subfloor, and ceilings.
Can I Fix A Shower Base Leak Myself?
Resealing the silicone joint at the shower base is DIY scope — strip the old silicone, clean thoroughly, apply fresh neutral cure silicone, allow 24 hours to cure. If the leak continues after fresh silicone, the problem is deeper (membrane failure, drain leak, or pipe issue) and needs a licensed plumber. Leaking showers under the tiles or behind the wall are not DIY territory.
How Much Does It Cost To Fix A Leaking Shower Base In Sydney?
Silicone reseal (DIY-suitable fix only) costs $20 to $40 in materials. Professional reseal: from $250. Removing and replacing failed waterproofing membrane: from $1,800 (involves tile removal, membrane replacement, retiling). Full shower replacement: from $4,500. The Plumbing Paramedics offer a free leak diagnosis to confirm what’s actually causing it before any quote.
How Long Does A Shower Base Repair Take?
Silicone reseal: same day, dry overnight before use. Membrane replacement with retile: 3 to 5 days from start (tile removal day 1, membrane and waterproofing day 2-3, retile day 4-5, grout and seal day 6). Full shower replacement: 5 to 7 working days. We give a realistic timeline before starting so you can plan bathroom access.
Will My Home Insurance Cover Shower Leak Damage?
Sometimes. Most home and contents policies cover sudden water damage (burst pipe, instant leak) but exclude gradual damage from failed waterproofing. If you’ve had visible signs of leaking for months and didn’t act, insurers will likely deny the claim. If the leak shows suddenly (e.g. shower screen falls and cracks the base), claims are usually accepted. Check your specific policy wording.
How Often Should I Have My Shower Checked?
Visual silicone check every 6 months — look for gaps, mould, or peeling. Full shower membrane inspection every 5 years for showers over 10 years old. We include a shower check as part of any other plumbing job in the bathroom — saves a separate call-out fee.

Our Services
Get A Free Quote
Contact us today for a free, no-obligation quote on your plumbing needs.